Showing posts with label Two Colour Quilts. Show all posts

Tuesday, 3 June 2025

Cobbled Nines - Part II


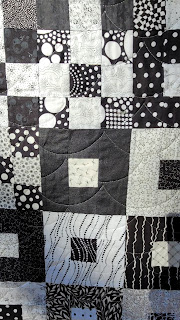
I sometimes wonder why I take such a long time to get my quilts quilted and finished.  This black and white beauty was made into a quilt top waaaayy back in 2014, as you can read in this blog post.  

It is probably one of my most favourite quilts of all time, made up from 'orphan' blocks where I co-ordinated the colours and went for a two-tone look.  It was also part of my black and white series.

Cobbled Nines - perhaps I should have had a different angle for the photo
- there's the shadow of a tree going across it! :)


The photo below is from my original blog post when I had just put the top together.


Below are some detail shots - I really, really should have thought about the shadows!  Two detail shots and one of the backing fabric which has some very cute deer on it.


I quilted cobbled nines with a metallic silver thread, using a clamshell design on my domestic sewing machine.  There were a couple issued with thread breaking, until I remembered to adjust my top thread tension on my machine - oh what a difference that made!  

Cobbled Nines was donated to "Gather the Girls" as one of their silent auction items and it raised $280.  I would have liked to have seen it go for $375, as that was the set reserve price, however, the lady who won it is very happy.

My second quilt that I donated to Gather the Girls is Spring Splash.  Upon re-reading my post about Spring Splash, I had completely forgotten that I was going to donate it to a different cause!  So, here I am now, donating it to another very worthy cause.


Monday, 18 January 2021

Green Ocean Waves

 Half square triangles.  A "bazillion" of them, or so it seemed at the time.  Over the years, I had been cutting up left over pieces of green from my quilt making into 3.5in squares and then turning them into half square triangles (hsts).

Counting the hsts.

The white fabric was a reject from another project, where it appeared to be "too white" but worked perfectly in this project.  After making and trimming to size all of the hsts, I then had to find pieces of green to make up the bigger plain squares.

Selecting the fabrics for the plain squares.

In an Ocean Waves quilt there are 3 block types:  A, B and C.  It's all about the directions of the triangles in the blocks.  So row 1 is A, C, A, C and then row 2 is C, B, C, B and so-on until the whole quilt top is laid out.

Laying out the quilt top.

I pieced all the A blocks first, then the B and finally the C.  That was fine.  The tricky bit was the layout and keeping the triangles going the 'correct' way with the block placement.  It did play tricks with my eyes and thankfully I pieced the top at a Retreat, so there many opinions in the room!  I found it interesting by the divide of opinion in the room.  It was like or dislike!  Having so much green was quite polarising for some.

Then came the pressing before quilting.  All those seams!  I pressed a bit, took a break, pressed a bit more.


I quilted Green Ocean Waves with a wave design and used a khaki coloured thread which blended beautifully with both the white and the green  


More green for the backing, with the meandering line and dots, I really liked how it set off  and complimented the colours on the front.


The first whole quilt photo was taken indoors and it glows.


And.... here is the whole quilt photo, taken outdoors in the late afternoon dappled sunlight.  Awesome!


I gifted this quilt to my 15yr old nephew K for Christmas 2020.  As soon as unwrapped the gift, he wrapped himself up in it, then opened it up and spread it across the couch, covering up his Nana and Dad at the same time.  He was very, very happy.  Being a teenager, I wasn't quite sure how the quilt would be received.

The next morning, he asked me a whole lot of questions about how I made the quilt, did I cut out all the triangles individually, how did I put it together for quilting......  My Sister (his Mum) said to me later that he had been complaining about all the "blankies" being too small to cover him while watching tv or lounging around and he had been asking for a bigger one.  She was happy too.  

I am happy.  The response from K was far better than I could have imagined.


Monday, 2 March 2020

Paper Doilies, Log Cabins and a very quilty week...

Last week was so very, very quilty!  Lots of sewing time to be had. 😊

It was a wonderful week. Tuesday was 3 hours with a group, followed closely by Thursday which was slow stitching at a local shop for 2.5 hours.  I took an English Paper Piecing  (EPP) project.

My "doily" so far.  There's still another round to attach,
but I haven't chosen the colour yet.
The diamond spaces are left blank for the
background to show through.


This is my "Paper Doily" project which I started in 2019 at a class with Leesa Chandler.  I attended the class so that I could learn something new.  I had never realised all the other possibilities before of using paper pieces to make up patterns like this.  I had always attached them to each other and thought that was it.  Once the final round is attached, the whole piece will be appliqued onto a background.  Such a fun thing to do with some stash fabric and paper pieces.

Friday was the day for my local quilt group.  I had plans to take my machine and continue working on Specky Stars, however, other things called me away and I didn't get there.

On Saturday, 29/02 - Leap Year Day - I attended a 10am-10pm sewing day with a group 1 hour away.  I took a scrappy red/white log cabin of my own design to work on.  I spent quite a bit of time both before and after Christmas cutting into my red and white leftovers from previous projects (scrap) stash.  Being 100% cut out and having lots of chain piecing, which is very repetitive, was a fantastic thing to do while catching up with friends.


I stood up and looked over the back of my machine
for this shot.  Lots of chain piecing.
Plastic tub with each piece cut and in piecing
order from the centre out.


With a bit of luck, this log cabin quilt will hopefully be published into a pattern.  It's been quite a while since I last ran a class and wrote a proper pattern.

On top of pattern writing and making the relevant quilts, I have a self-imposed goal of completing 9 quilts by the end of July and 4 of those quilts I plan to exhibit.  A couple will become gifts, 1 is for a class and the other 2 I am not sure where they are headed to yet.

I'm feeling as 'pleased as punch' right now.  My goals are on track and I've spent some very precious time with some very special people.   Life is good.


Tuesday, 3 April 2018

March is for Donating

During March, the time of Lent, it is a time to give something up and also to think of others in their struggles.  For me, in my own personal life, there are two amazing women who do a lot of work to support very sick children.

As I've written in some previous blog posts about donating quilts, here are some quilts that I've finished over the past 12 months and they have not found homes, so I'm donating them to the Very Snuggly Quilts program, which supports long term or terminally ill children at the Royal Children's Hospital in Melbourne.
Squared Away - Green

Squared Away - Purple

Little Big Stars

Orange and Green 9 Patch


And for my beautiful friend E, who runs a Royal Children's Hospital fund-raiser each year since her daughter died, I have donated:

Blue Stars

Red and White Checkerboard
* As a side note, I took the two quilts (above) to a professional appraisal/valuation, so that their true value can be put onto the silent auction form.  A very interesting experience, if a bit nerve-wracking!  You leave your quilts and then pick them up a few hours later.  It's all in their hands and you really have no idea until you read the valuation certificate after collection.  And... my nerves were all for naught - the valuations surprised me and the ladies who are the "officials" of the day were wonderful.  A process I shall certainly take part in again.

And..., one more donation to the Lions Club of Quilters for their bushfire victims collection, I am donating "Cobblestones and Bricks", which was my very first quilt that I made a pattern for.  It now has a chance to go to a good home and be loved now that the pattern has been retired.  A good "manly" quilt this one to be sure.
With donating quilts and being asked to take part in a donations program, you know there is always someone out there who will receive a good quilt hug.

Tuesday, 27 June 2017

Blue Stars

At the start of the year, when I was going through some projects and doing a bit of holiday sewing, I pulled out what was supposed to be a project of "Strippy Stars".  A declared WITB* to work on and finish. I decided not to make the full original pattern, but just complete the partially made stars, put them with the completed stars and then decide upon a setting. 


Sometimes, we start projects with the best of intentions, but they don't always work out how we have perceived them in our mind's eye.  When I purchased the fabrics for this quilt, it was for a fun day of sewing at a local Scouts fundraiser in 2015.

I purchased the fabrics at a large quilt show, and loved the blue batiks, but struggled to find a background that I really liked.  I purchased the one you see in this quilt, and I'm pretty pleased how it has turned out, however, it didn't work when I went to set the stars in the planned zig zag setting.  I truly wasn't happy with the original quilt plan at all.  So, as all projects do when feeling dis-enchanted, it hopped into a plastic tub and into the cupboard it went.

I was able to make 20 star blocks and binding from the remaining fabric.  (The rest of the batik fabrics went into 'Twas a Mystery - just in case you think the colours are familiar)

In the end, it turns out that simple can often be the best.  Straight sets, with sashing and cornerstones.  Perfect.

Simple quilting with tumbling leaves and loops over the columns of stars with 'in the ditch' quilting along the long lines of sashing and two long borders.  

One would think that is easy - right?  No, sometimes things just go a bit awry...  I was stitching in the ditch, after I had quilted the swirling leaves, and decided that the quilt needed a bit more stitching to make things more even.  Mistake number 1, should stitch in the ditch first....

The needle fell out twice - had to tighten it.  I really struggled to push the quilt through the machine when it normally glides.  I checked the presser foot pressure, I re-threaded the machine, checked the bobbin, cleaned out the bobbin race, everything I could think of.  It was only when I finished the ditch quilting, ignoring the slightly wobbly bits, and went to change to my walking foot to attach the binding, that I realised when I put my open toe foot on - I had not tightened the little bolt which holds the foot on, it was just sitting there - no wonder it didn't work!  The foot was just swinging in the breeze and I didn't notice...  No wonder it was such hard work.....Sheesh....  Mistake number 2, because I kept on sewing.  Then I had to reverse sew and then forward sew and sew on....

However, I am pretty pleased with the overall effect of this quilt and it's simple setting.

And to finish off, here's a peek at the backing - gorgeous blue deer...


* WITB = what's in the box/bag

Monday, 3 April 2017

Pink Pinwheels

Pinwheels, outside, in the sun, spinning in the breeze bring a smile to anyone's face.  Kids are delighted by them, adults watch the children's joy.  There is something delightfully whimsical about them.

An invitation to a High Tea and a request for silent auction items, was the prompt I needed to make a picture I had pasted into my 'one day' notebook a couple of years ago.  


It was also the perfect excuse to go and purchase all new fabrics and not use my stash for any of it.  So luxurious and lovely to have a little splurge in the quilt shop.


And I'm so in love with the backing fabric, flipping it over onto the front gives a lovely contrast.


All proceeds raised from the bidding and sale of Pink Pinwheels will go to the Royal Children's Hospital in Melbourne.


Whimsy and little girls were in my mind when I made this pink pinwheel quilt.  I do have to confess, the colour scheme was not my idea.  I had spotted the picture online and then it took me ages to find it again so that I could give correct credit.

My inspiration was Pretty Pink Pinwheel as shown on this blog - Quilting is My Therapy.   


Now it's time to go outside and enjoy the breeze in the sun.....

Friday, 13 January 2017

Six projects in 10 days!

Last post I wrote one project at a time - but I just cannot help myself.  However, lots and lots of progress has been made on 6 projects!  One simply cannot get bored....

So far, so good - here's the update:  
1.  Book It Challenge #1 - "Poppies" table runner (see previous post) all shapes are cut out and fused to the background.

Fused pieces, ready to applique.

Miscount - had two extra leaves, so have stuck them on the back.


2.  Merry Mayhem - New Year's Day Mystery - (44in x 48in) 
quilt top completed, with backing and binding made.  Every single thing in this quilt, top, back, binding, wadding and thread is all from stash.  It's on my UFO list because it was started before Jan 1.


I changed the size of the larger background pieces to make it a good cot or lap size quilt.  I am really pleased that each block has it's own star in the centre.  A moment of serendipity with where the colours ended up does make me smile.  There's always some trepidation with a mystery quilt, but I worried needlessly with this one! :) 


3.  Flying Kids - my own design, for which I have completed the top, backing and binding.  Will have it's own post next week.


4.  AP&Q+ Stashbuster Project - Part 2 - not touched, but thought about.  Have made a decision on my choice of applique picture for center block because I don't really like the one in the magazine pattern - sun bonnets are not my thing.
Block 1

Block 2
Block 3


Bonus projects - oh ooops...


a) WITB* - Strippy Stars project, will be somewhat smaller than originally intended because I stole the blue fabrics from the box to make #2 above.  Opening the box caused me to re-evaluate that particular project and why I had stopped working on it.  I will not make the full original pattern, but just complete the partially made stars and then decide upon a setting. 


b) WITB* - Purple Butterflies - stopped approximately 2 years ago because I didn't like the applique thread.  What had initially seemed OK, actually was too light when stitched.  Yesterday 2 friends came for a sewing day and were asking me about the butterfly quilt - pulled it out and had a look.  Last night while watching a movie, I unpicked the applique stitching and re-pressed the top.  It is now ready for me to machine applique with new thread.


Having made progress and decisions about 6 projects is such a relief.  The thought of finished projects being visible in the near future is a great motivator!   Especially as 5 of these projects are more than a couple of years old......

+  AP&Q = Australian Patchwork and Quilting Magazine.

*  WITB = what's in the box/bag/basket - another fun little challenge to play along with


Friday, 27 May 2016

An Afternoon with Jane Stickle

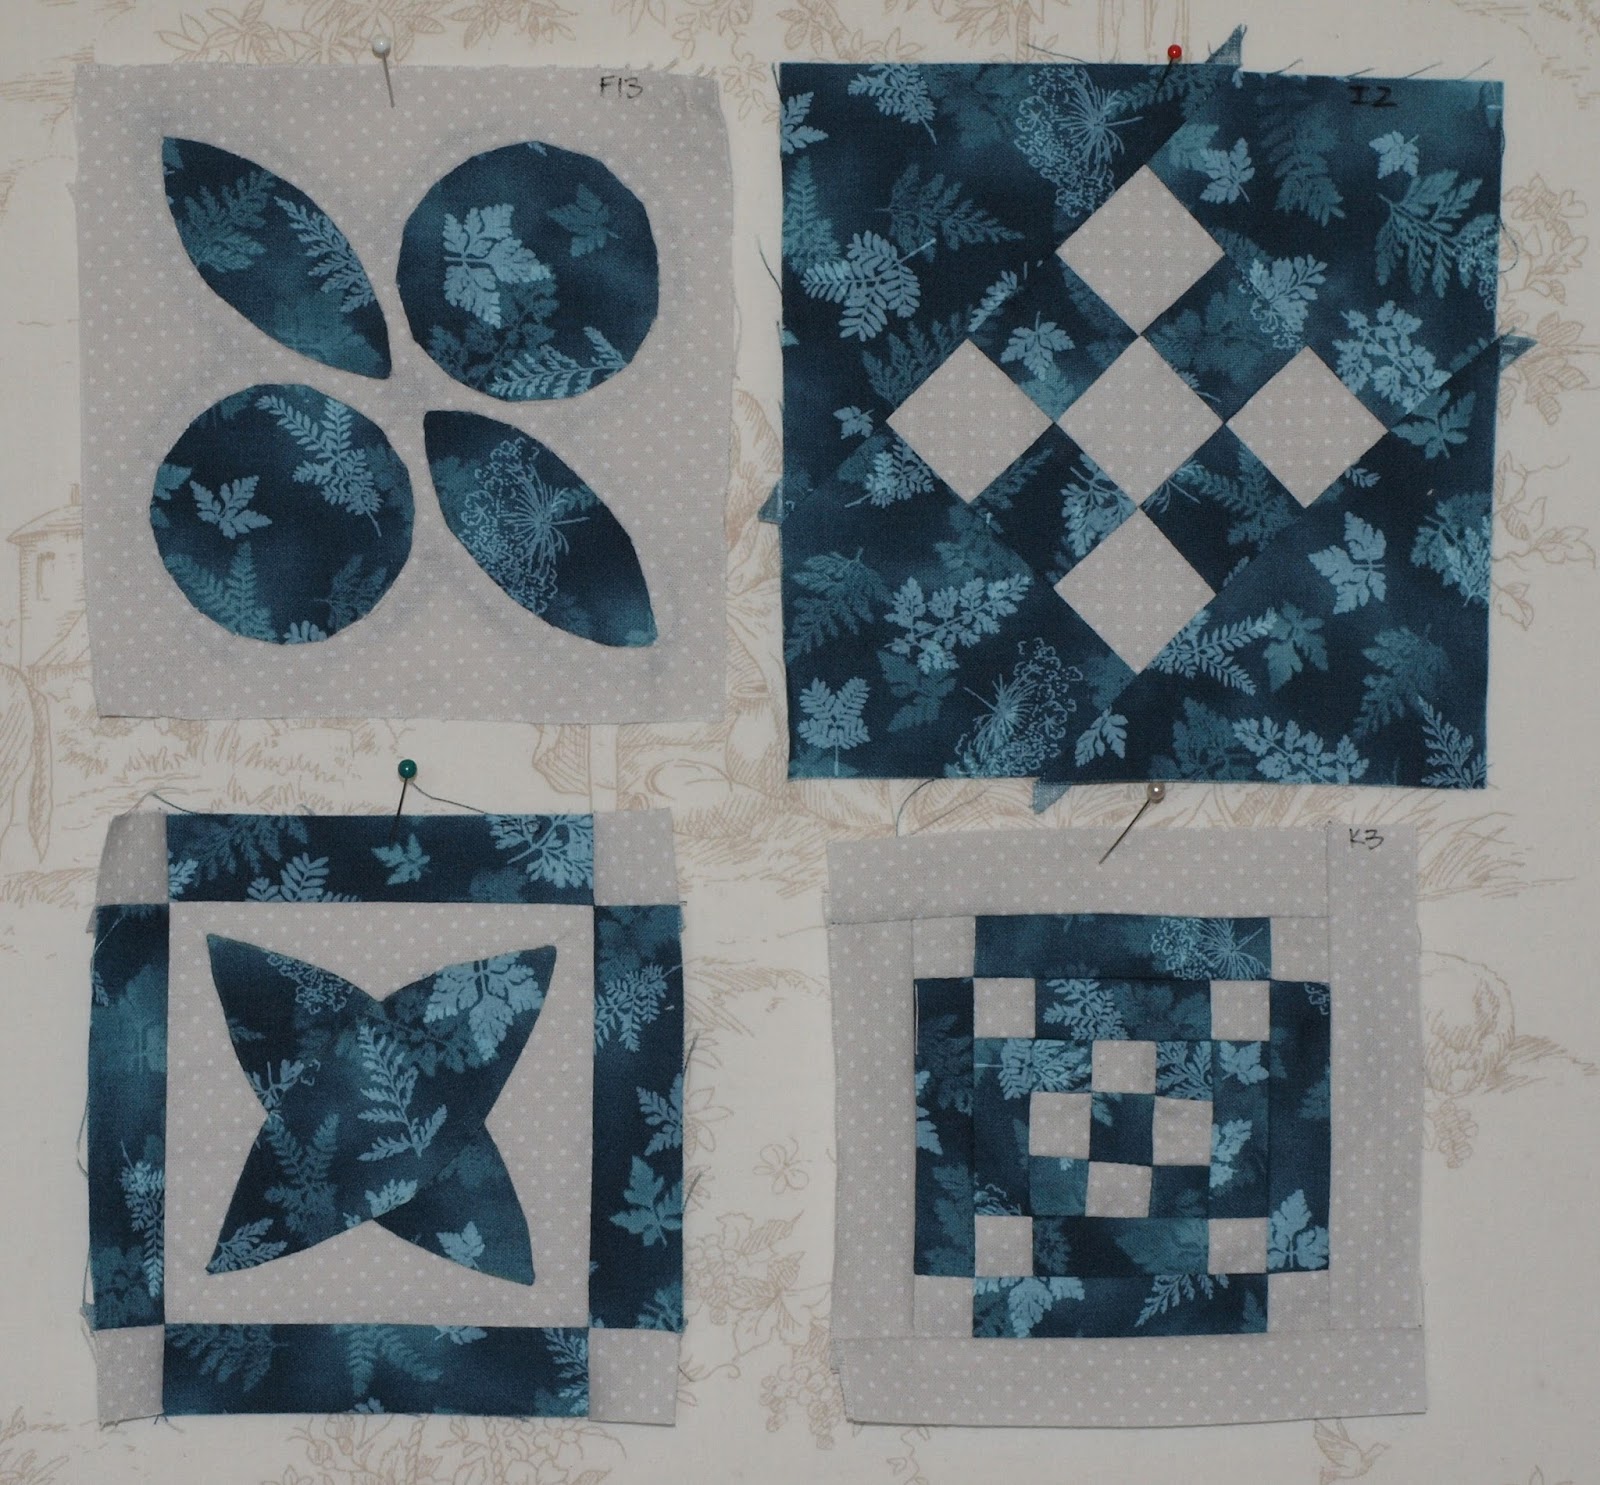
Back in February, there were some of us who got together to start our own individual Dear Jane quilt(s), at a pace of just four blocks per month.  Due to my lack of photo taking, plus some blocks to make, I've had a lovely day today catching up with some sewing.

My blocks do look a bit "out of shape", as I am yet to trim them to their correct size.

Here are the March Blocks:


And the April Blocks:

I had two blocks to make today... to make up the four allocated for the month.....


And... the May Blocks:

...of which I made all four today.


I am truly enjoying the process of making the Dear Jane blocks.  In two colours, the piecing shows up well, but, most importantly to me, the level of difficulty in the blocks varies and with no instructions in the book, there is some quiet contemplation while I decide the best way to make each block.

One block at a time, is a lovely link to slow movement and taking time to enjoy the process.

See my previous Dear Jane post here.