Over the past few months, I have had the pleasure of becoming aware of the 100+ Hearts Project, started by anakiequilter . She is one person, making waves in the push for heart disease in women to have greater recognition. She has had to share her own story and become vulnerable to the general public. Little did I know that when I was researching the story of one of my work colleagues, that I would have my own story.
This first heart picture, I was making for my colleague who ended up with two major surgeries and missing major life events due to a heart attack. She was the most unlikely person, not meeting any of the "standard" criteria that normally gets associated with people having heart attacks.
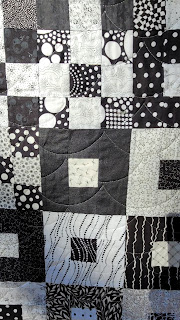
I chose the twisting spiral heart design because I feel it represents the upheaval and 'fractured' life which follows a major heart attack. When I said this to my colleague, she agreed wholeheartedly. A broken heart breaks lives.

The second picture, below, is to represent my own 'series of small heart attacks' that have taken place over the past few weeks. My story is completely different because I was mostly asymptomatic except for not feeling quite right, until a significant moment of severe muscle spasms in the early hours one morning in my back and shoulders. My story relates to the electrical circuitry of the heart. No blocked arteries, no aorta wall splits, nothing, just the electrical signals not working properly.

I am acutely aware of how much I don't know about heart disease. It is something that I thought would never happen to me, but it did. Now, I need to heed the advice given to me and things will improve. I am very blessed with my friends, colleagues and family. As I write this, I am still in a state of disbelief, wondering if it was all a bit of a 'storm in a teacup'. I'm told that this is a common reaction and it will pass.
Time now to get off this lightbox and go find something crafty to get stuck into!
Patterns used: Twisting Spiral Heart and the four heart block is my own design.


.JPG)


